Big Ideas
I get ideas for projects all the time. Some are for TV commercials, some are movie ideas, some are about camera mounts or camera motion devices, some are for Bible quizzes or Bible studies, some are for ways to make the garden better, etc., etc., etc… I get lots of ideas for improving my Quicksilver MXL. Most of them I do not pursue. This time was different.
Cold Weather Flying
South Central Kansas has a relatively moderate climate. It gets cold in the winter but nothing like the Winter my Buddy Dave O’Malley endures up in Canada. Our winter is probably like Spring or Fall to him. That being said, The Sky Surfer‘s Fun Flite “Fun Quotient” radically diminishes during our 3 to 4 month “cold spell”. For years I have sought a lightweight, winter enclosure for the MXL to no avail. This season I got the “big idea” that instead of having a complete enclosure, maybe all I needed to do was interrupt the direct wind blast from the airstream that causes the wind chill. The biggest problem is my hands. Being totally exposed to the wind, before too long they freeze up even when wearing electric gloves. It’s that Wind Chill Factor. The following story outlines the path I took to prototype a “wind break” to see if it would be effective in keeping my hands and torso from freezing up in flight.
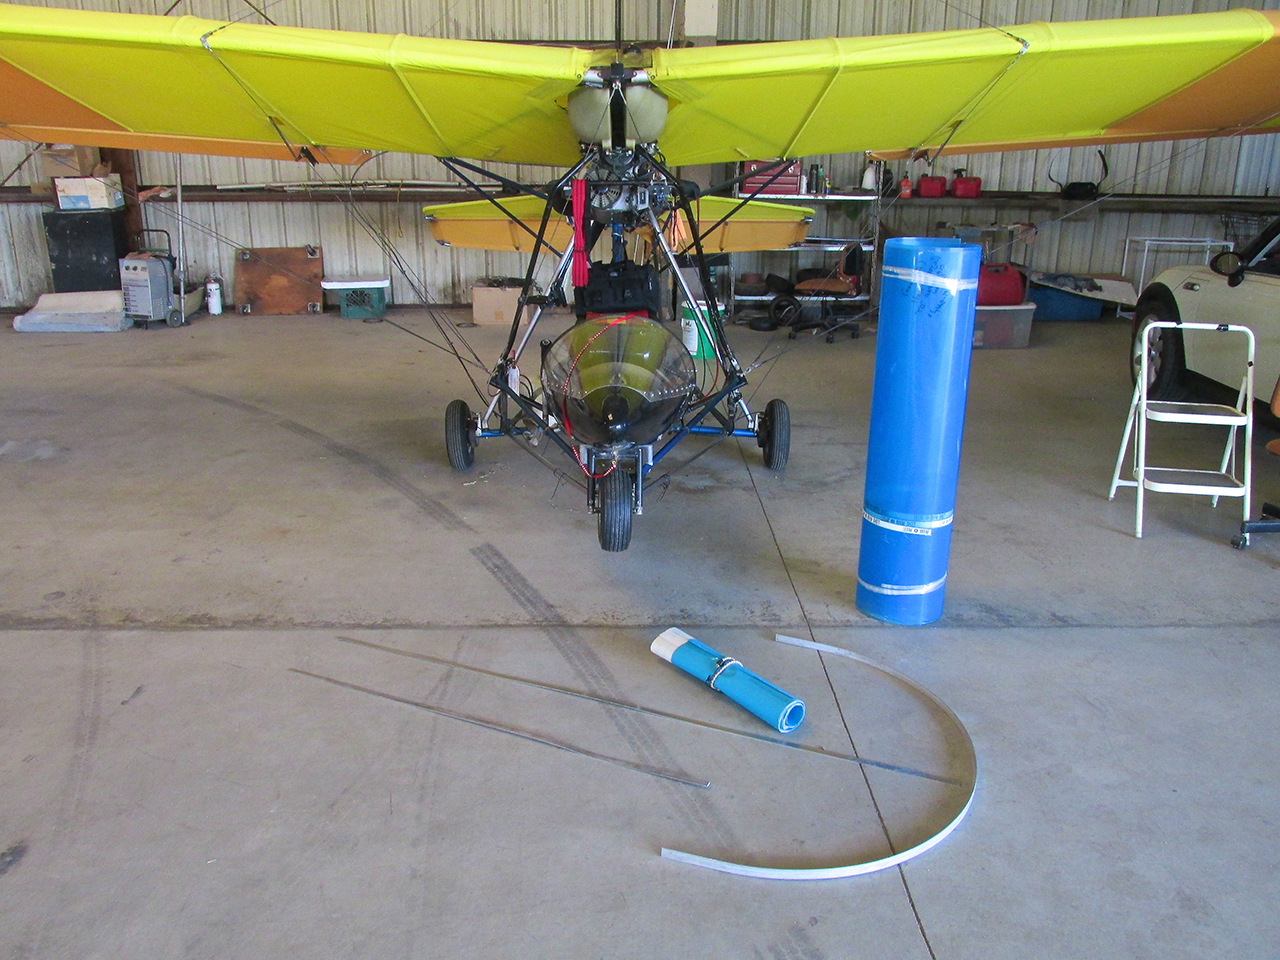
4′ x 8′ of Polycarbonate sheet, paper for making a template and aluminum straps.
You Gotta Start Somewhere
Above you see the materials I started with. I already had the construction paper (rolled up on the floor) but I went to The Yard (Wichita’s Homebuilder Playground) to get some aluminum straps. Then I went to Regal Plastic of Wichita for the Polycarbonate sheet. The construction paper was used to make a mockup/template of my design. From that I would cut the plastic sheet. Sounds easy, huh?
Editor’s Note: On 13 May 2015 I received an interesting email from Sunny of Excelite Plastic of Shanghai, China. He liked this article and was inspired by it to create a “Polycarbonate Bible” page that will make you an expert in the material in 100 minutes (you can see it HERE). Sunny asked for a mention in this story and so here it is! I think I will mention his Bible in my next post, too.
One of four different support arcs tested. Here it is temporarily held in place by tie wraps.
Strategy #1
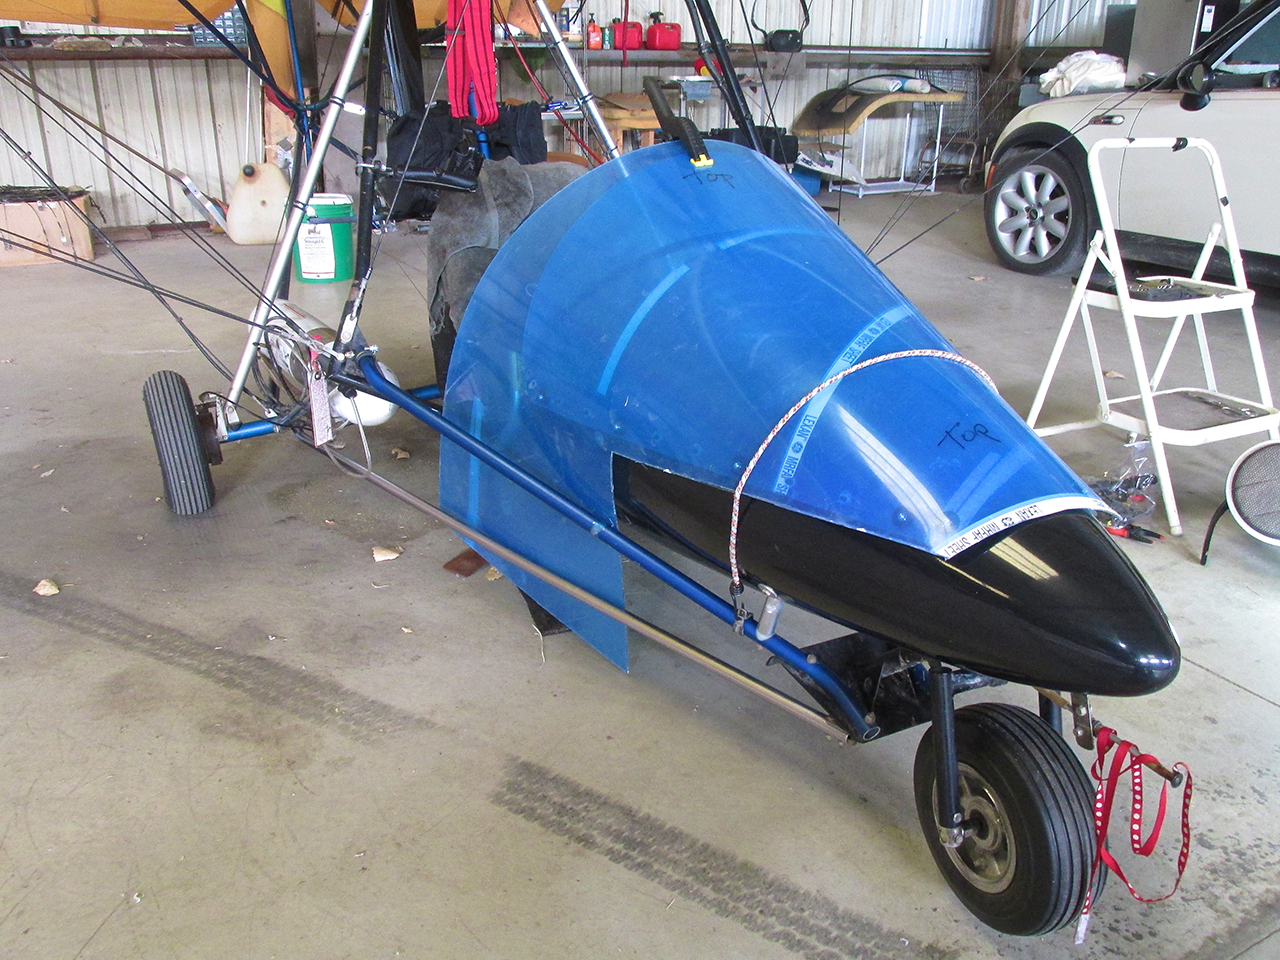
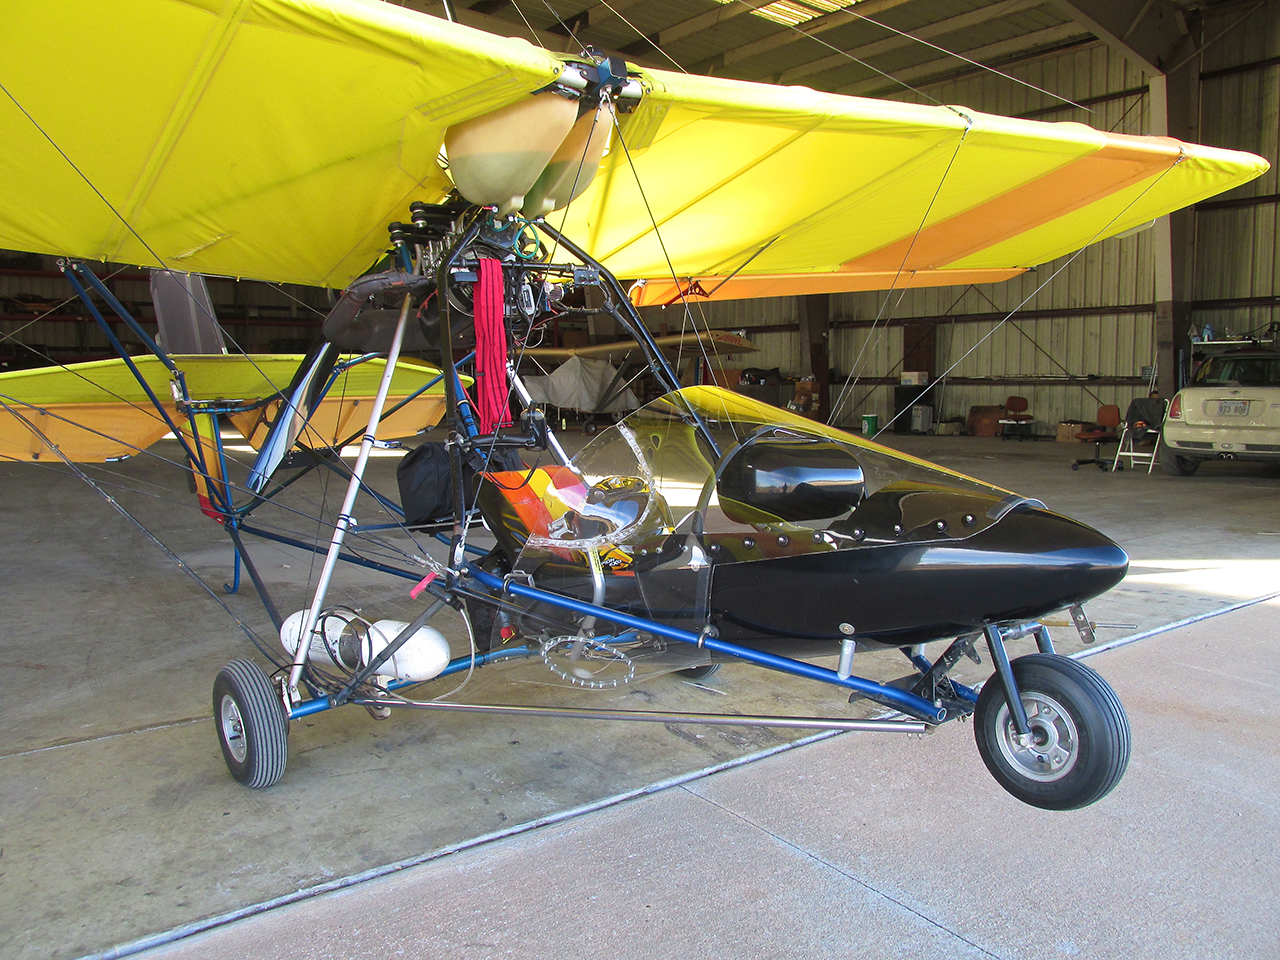
The first general plan was to make a windshield “enclosure” that would overlap the regular “Summer” windshield and fairing you see above. Why do it that way, you ask? Well, I wanted to have a “Winter add on” that would not require removing or changing the pod/windshield combination I use for the majority of the year. Although others recommended it, I had great resistance in my mind to removing the regular windscreen. I wanted something in the manner of the snow skis that are attached under the tires of airplanes – relatively easy to attach and remove. What made it hard for me is that the fasteners you see holding the windshield (above) are short screws with nyloc nuts on the inside. They are quite a chore to remove and replace. AND, with the deeper windshield I was planning, this fastening method would be impossible to accomplish single-handedly. It would require two guys. I wanted something simpler…
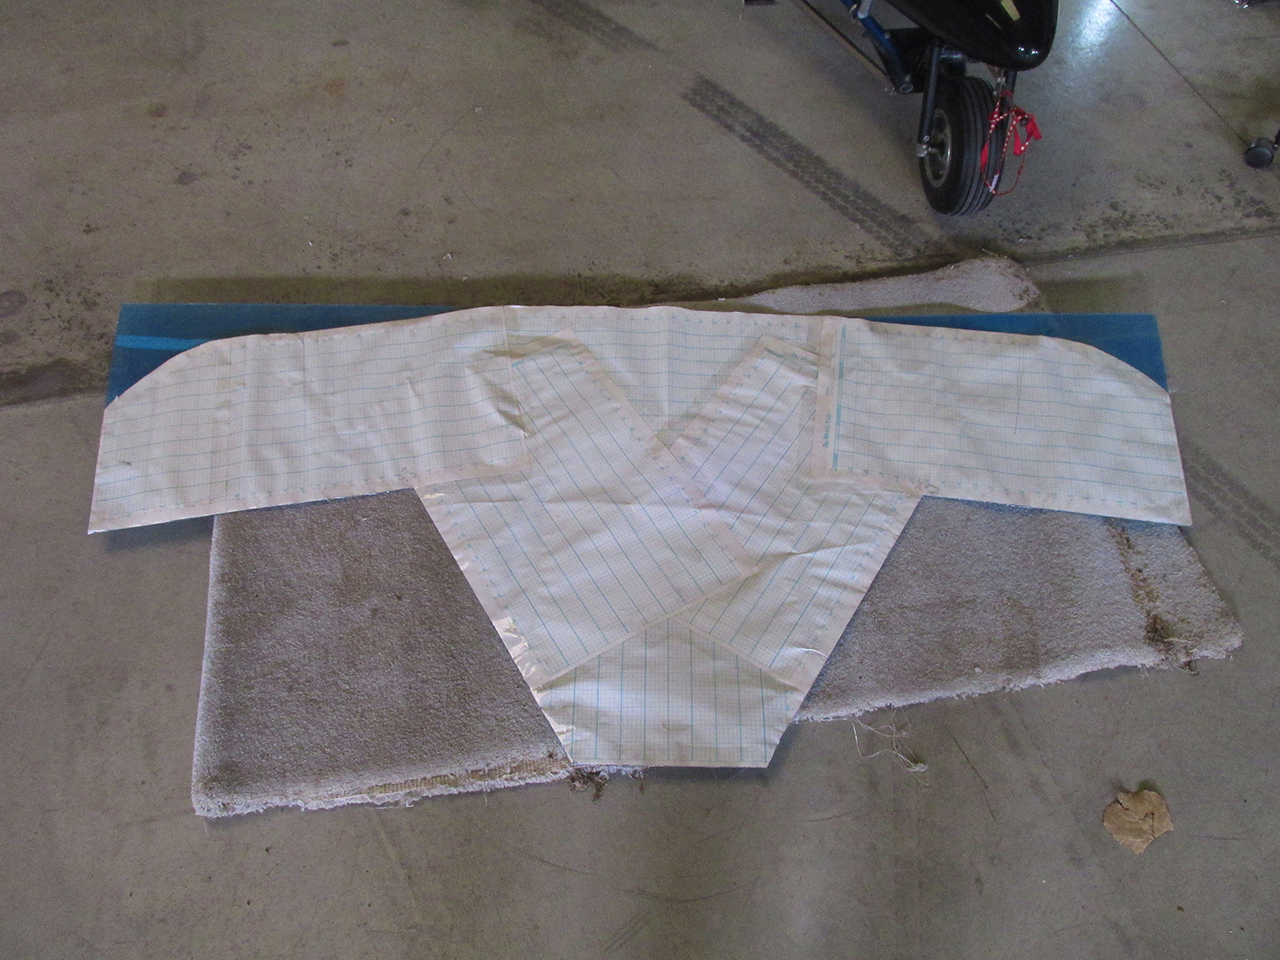
The initial template (photo complete with scissors and clip). The Sky Surfer was not pleased.
Wrapping Paper
Using clips I bought at Sears, I wrapped the template around the area to get a general idea how it would look and by what means I might attach it securely to the plane. It would have to be tight enough not to pull away in winds in the vicinity of 70 mph (at least). I don’t fly that fast, but I was over-engineering for safety. Another issue in this regard is that attention must be paid to ensure that wind cannot get “under” the sheet and either pull it up and off or cause it to “flutter”. Aerodynamic flutter (aka: aeroelasticity) is a term often linked with the word “disaster”. Aerodynamic Flutter is why car dealers constantly must buy new American Flags for their dealerships. Flutter is the phenomenon that tears the “flapping end” of a flag. It will also tear sections of an airplane apart.
The first design permutation (shown above) did not inspire me. It lacked visual and structural elegance. To me, the MXL with its black nose fairing is “very easy on the eye”. It looks like it is meant to fly. Turning it ugly would be a deal breaker even if the wind chill was abated.
Though it might not seem like it, at the point in time shown above, I had already spent significant time and brainpower over the prior two weeks – cutting paper – visualizing – pondering. After having all that come to this ugly result, my Rational Mind wanted to chuck the whole project. The Obsessive, Willful (and controlling) Part over-ruled and demanded we press on…
The inside view showing the large gap where the Winter Windshield template wrapped around the nose wheel tubes.
Suspicions Arise
As alluded to earlier, problems with Strategy #1 began to manifest soon after finally getting the paper template in place. It looked “clunky” and there were unacceptable gaps. It was evident that I needed a “flush mount” to bring the polycarbonate sheet in closer proximity to the black fiberglass fairing. I “sighed a thousand sighs” as I realized this project was going to be much more involved than I had hoped…

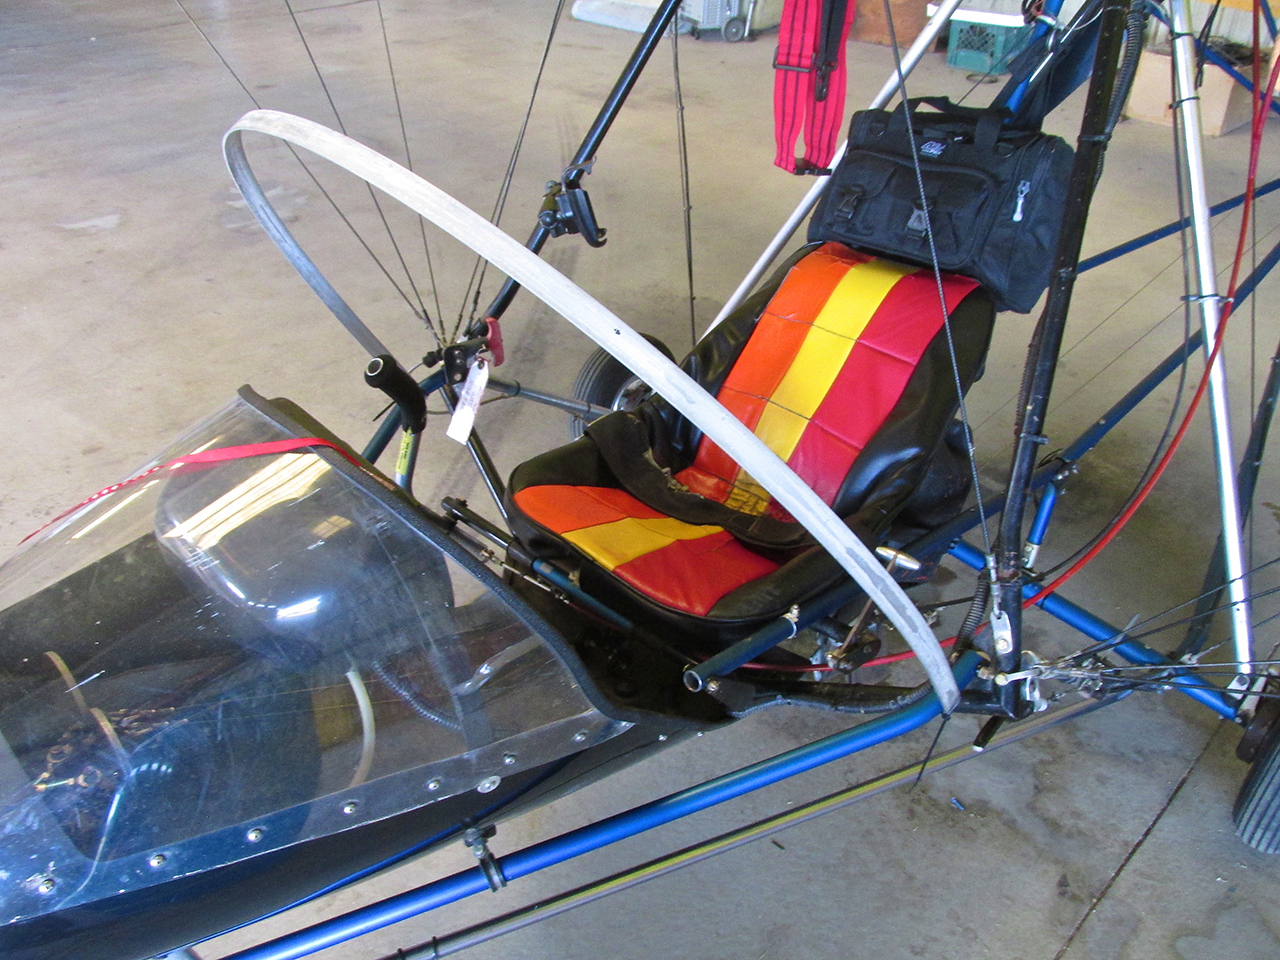
Aluminum hoop mounted on the outside of the cage.
In-y Or Out-y?
After deciding that the shield would have to go inside the nose tubes to be flush with the fairing, I was presented with the problem of how to keep the shield on top of the aluminum strengthening arc. After pondering this riddle for a couple of days it occurred to me that I could mount the shield under the arc support and attach it from above with 4 to 6 velcro loops. The moment this occurred to me, I just knew this “breakthrough” put me in the pantheon of the aeronautical engineering greats.
(NOTE: This all occurred before actually fitting the windshield in place. I wrongly assumed the hoop would be necessary to keep the windshield from buckling or warping under the wind load. When finally performing a test mount, it was obvious the polycarbonate was stiff enough to function without support and I dumped the aluminum strip altogether.)

Strategy #2 put the shield flush with the pod and under the stiffening hoop. The Sky Surfer was starting to like the look of it but it was still not right.
Throw In The Towel
After looking at Strategy #2 for a while, I was still not impressed with my effort. I took a break from my “Day Job”, drove out to the hangar and for about an hour stared at it from a variety of angles. Gradually it dawned on me that my insistence on making this an “easy on – easy off” Winter Windshield was what was killing me. I humbly realized (for about the 79th time in my life) that my desire for a “short cut” was in fact taking far longer and was leading in a direction far poorer than if I “did the right thing”. Even though I had already expended a considerable amount of effort and was nowhere near to cutting plastic – I started over.
Hook It On Better
Before even initiating a new template, I decided the first order of business would be to discover a more amenable windshield attachment method. If I could make that easier to do, the whole project would be more appealing. I queried all my flying buddies. Nut Plates was a consistent response. Riveting was another. The nose cone fiberglass was too thin for nut plates and riveting due to its semi-permanent nature was unacceptable. Neither worked for me. Then I ran into Airbike Ace Paul Fiebich at the hangar one day and asked him if he had an idea. Immediately he had the perfect remedy. He walked me over to his plane and showed me the method used to attach his Airbike cowling to his frame. With it you run a bolt from the inside of the fairing and “trap” it between lock nuts employing washers to spread the load. This creates a stud on the outside of the pod which is run through the hole in the windscreen and then “capped off” with an acorn nut (aka cap nut). It was the perfect solution. Airbike Ace saved the day!
Strategy #3
Do The Right Thing
Now that I was past the “attachment problem”, I set about crafting the Winter Windshield as a complete windshield replacement rather than an overlay. I took the old windshield off and used it as a template to match the bolt holes. Then, using new template paper, I tried for the best coverage I could while still being able to enter and exit the driver’s seat. I also wanted a clear view forward. So, my head would be above the windshield.
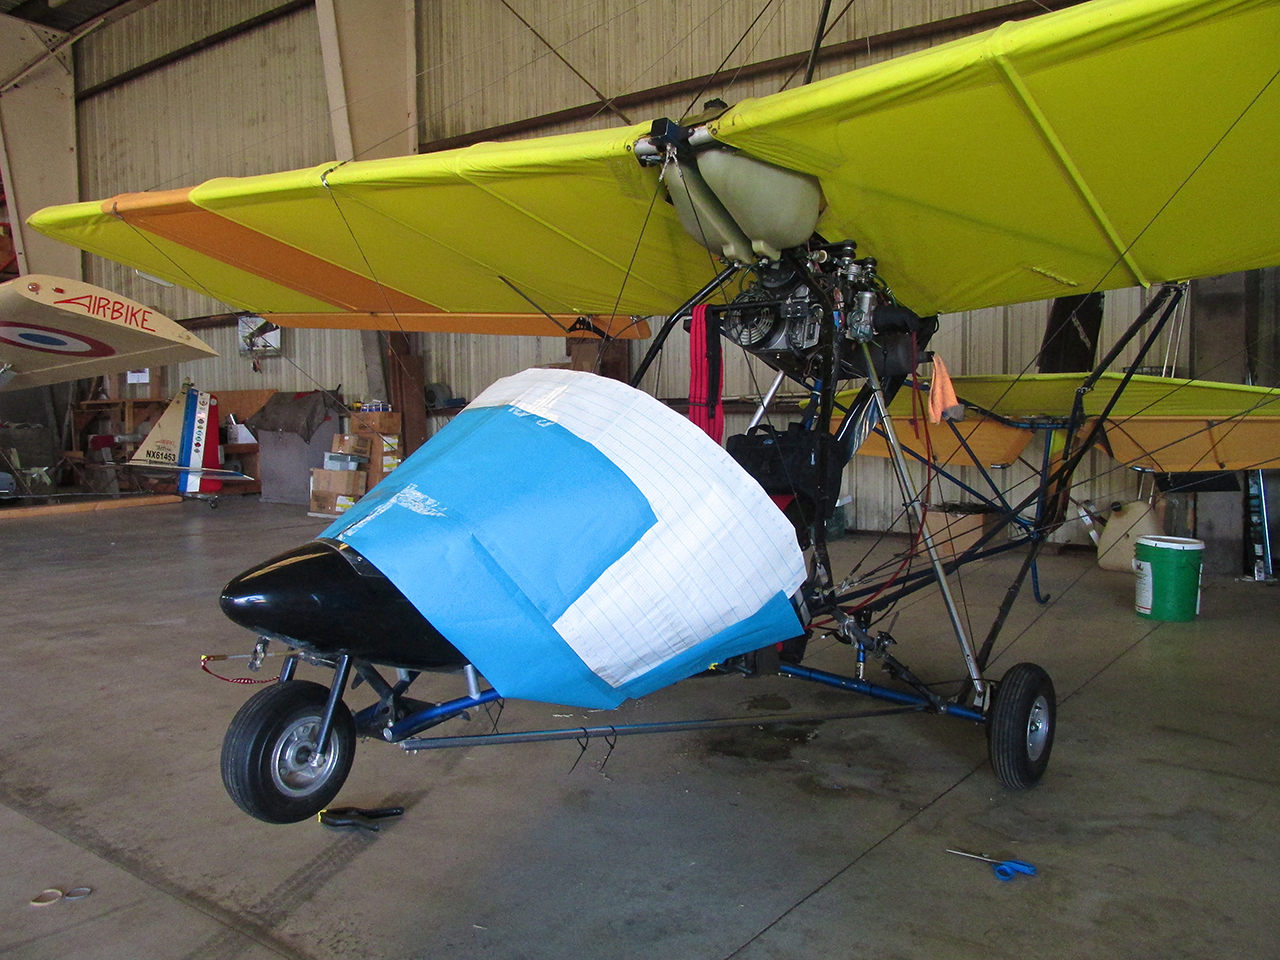
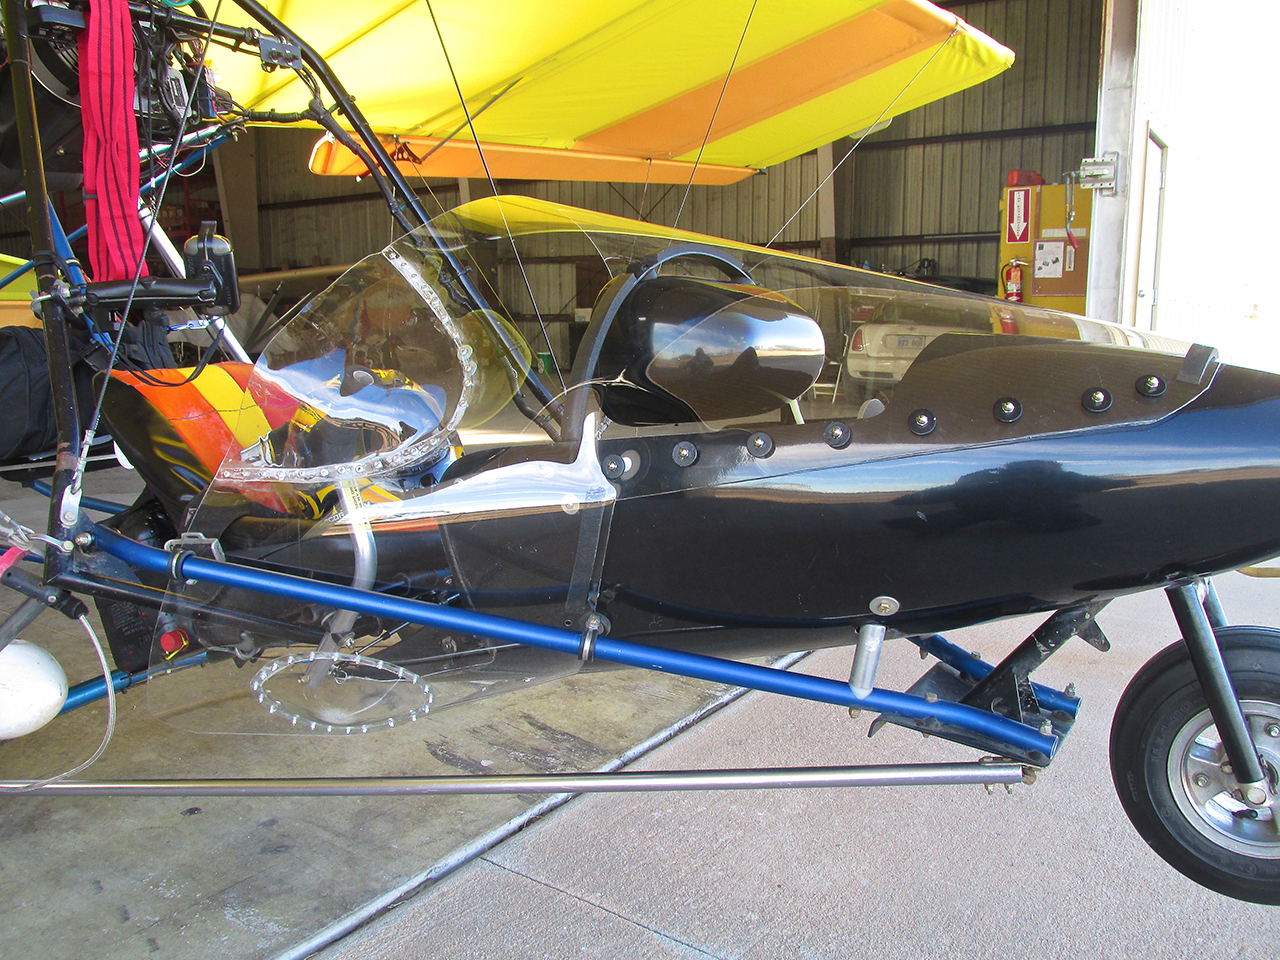
Strategy #3 in place for initial fit checking. The “blue” is a covering film overlaying the clear polycarbonate underneath. It helps ward off scratches during handling.
Asymmetrical Ringer
In discussing Strategy #1, I only talked about “wrapping” the windshield around the nose tubes for the potential ease of installation and mounting simplicity. Actually there was another huge, over-riding issue. The Quicksilver Control Stick.
Quicksilvers (other than the GT Series) use a right hand, side mounted control stick.
NOTE: Some think it is easier to get in and out of the seat with a side stick. I have been flying Quicksilvers since the 80’s and had not cared one way or another until after logging a hundred hours each of the last two years (often in considerable turbulence). Now my right shoulder is speaking to me. It has been so over-stressed it wakes me up about every other night. But I digress…
The reason I bring it up here is that the side stick presented a huge hurdle to overcome in fitting the enclosure: Travel Clearance. With the windshield “on the outside” of the tubes, I could more easily accommodate the outward travel of the stick by allowing more bulge in the plastic on the right side. Now, because I was “tightening” the installation, the bend required to clear the stick was outside the polycarbonate material’s limit. It began to crease, created mechanical tension and, worst of all, it looked bad.
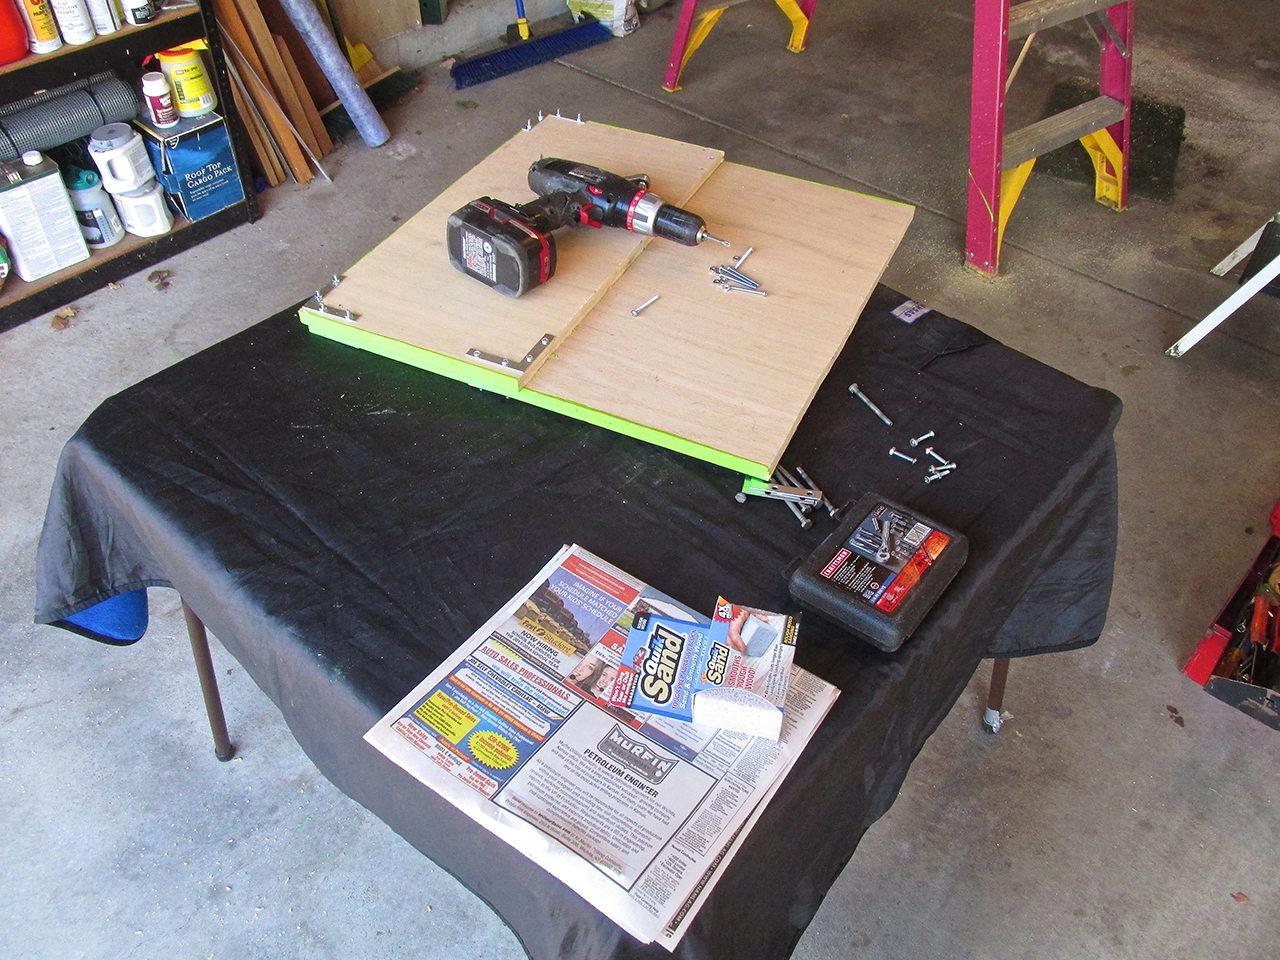
Making a “Tool”. I had a nice plank no longer needed for its previous purpose as a “video green screen” platform. It would be flat and sturdy enough to “trap” the plastic sheet so I could apply heat and force to shape it.
Never fear, another answer’s always near… and that answer was HEAT!
A truly marvelous characteristic of polycarbonate is its ability to be formed when heated. When the right tools are used it can be shaped into the most attractive aerodynamic forms imaginable. The most advanced Fighter Airplane in the world – The F-22 – features “the largest piece of monolithic polycarbonate material being formed today” and it is a masterpiece. More about it HERE.
Looking to heat shaping as the cure for my problem, after the windshield was finally cut and installed on the plane, I brought a “plastics guy” out to the hangar. I wanted to see if we could use a heat gun and a hand-held form to stretch the material enough for stick clearance on the right side. While that experiment did not achieve the desired result it was not a complete loss. From it, I learned first hand how a polycarbonate sheet reacts to heat and roughly how much heat is required to get it to the point of malleability. I didn’t take any pictures of this first effort but basically it was too “lumpy” and got burned in a couple of spots. When I say “burned”, it would probably be better to say “boiled”. When overheated, rather than turn black, thousands of small bubbles appear inside the sheet and cause it to become an opaque white. With more heat it will turn yellow. I suppose after that it would char but I never got that far.
So, rather than throw the whole piece away because it was “lumpy”, I set out to make two inserts that I would glue into place to make “travel space” for the control stick. The project was entirely in control now. I was just along for the ride.
I had a large sheet of wood that had previously functioned as a “Green Screen Platform”. I got some “L” brackets and fastened the two pieces together as shown above.

The two “plates” were then cut “as one” and then clamped to my bench so the tool would hang over the edge. After trapping the plastic sheet between the plates, heat would be applied from the bottom and force applied from above.
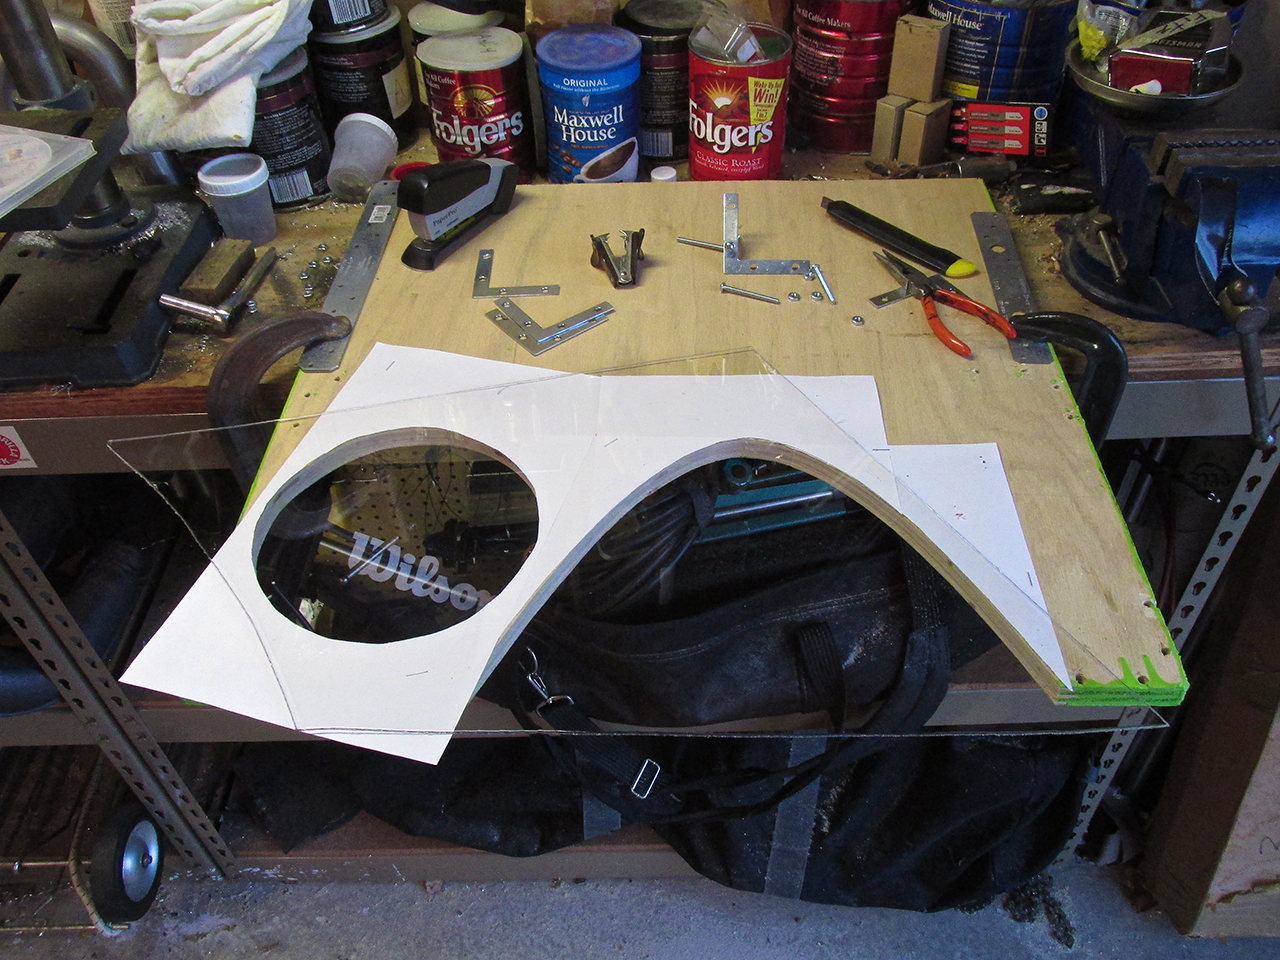
Here is a sheet of Poly-C before clamping it between the other face of the tool. I cut out paper to “face the wood” so that if the plastic got too soft it would not adhere to the wood. This turned out to be unnecessary…
More Like “Heat Resistant”
This discussion might seem tedious but – believe me – I am leaving lots of the procedure out. For one thing, I had to do this “forming” process twice. I spent a whole afternoon with a heat gun and a basketball as forming tool and barely made a dent. It would take up to ten minutes of carefully waving the heat gun back and forth so as not to burn it before the polycarbonate would finally reach the point of malleability. Then, when I quickly put the gun down to apply pressure, the plastic would cool down almost immediately. At the end of about 3 1/2 hours I was not happy. The surfaces were “lumpy” again. The result was “sub-par”. I analyzed the situation and resolved not to give up.
Answer Near By
I knew the professionals who shape polycarbonate use ovens or autoclaves to evenly heat poly sheets before quickly putting them into a vacuum former. I didn’t have all that. But, as I thought about it, mere inches from my feet (as seen in the photo above), I had the answer to a more uniform heat. I keep my tungsten video lights in those black bags. Those suckers are so hot that when using them on location, precautions have to be made not to start fires. Suddenly, it seemed the obvious heat source to use.
The view from underneath the tool with a 2,000 watt spotlight beaming in on the round polycarbonate insert.
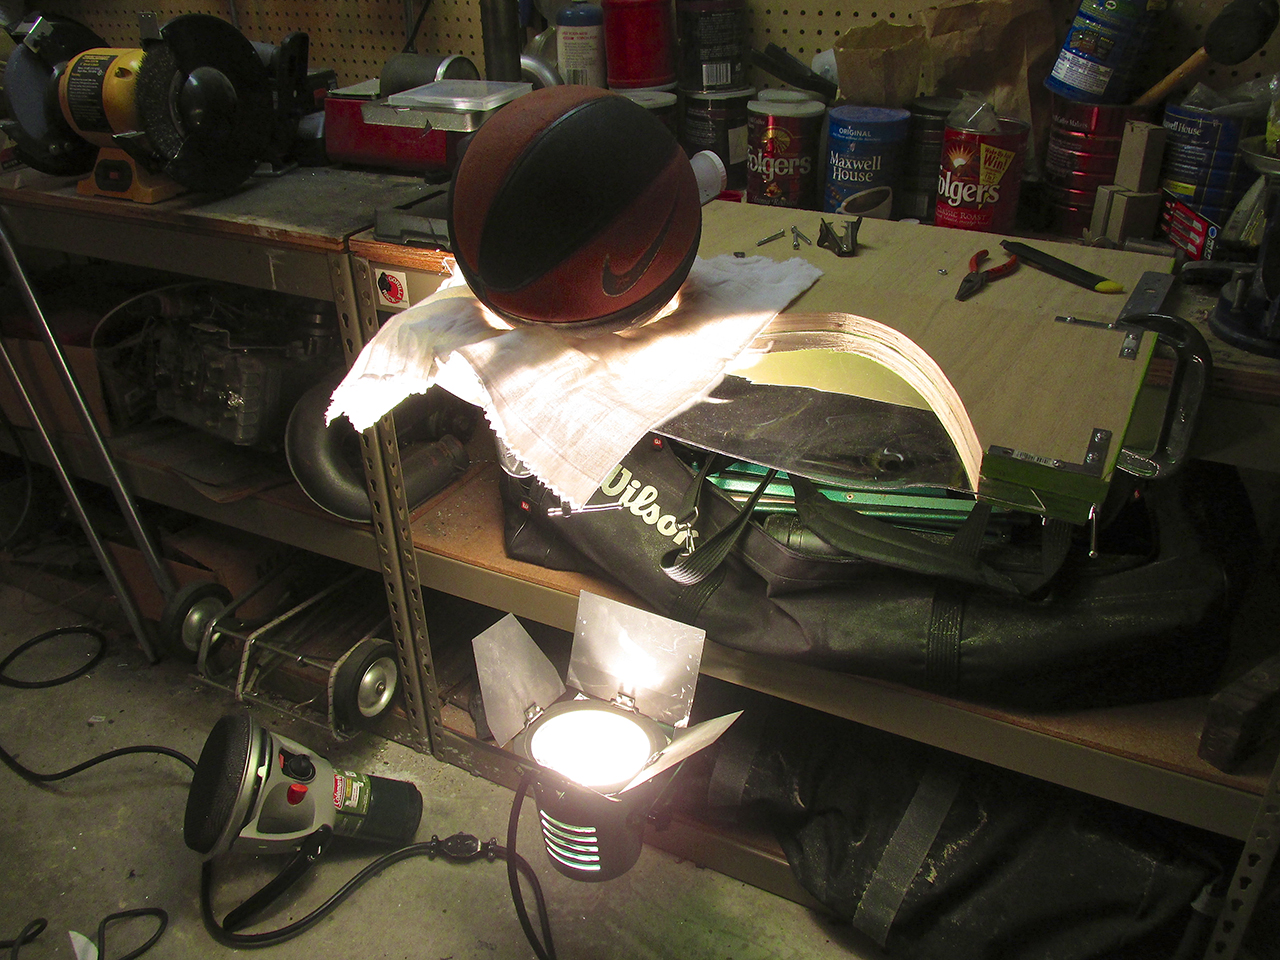
A wide shot of the same scene. When the plastic got to its malleable stage I would press down on it with the basketball. Later I put a thin pillow under the ball to soften the curve. The parabolic insert on the right was a little lumpy at this point but after a few hours I was able to smooth it out a great deal.
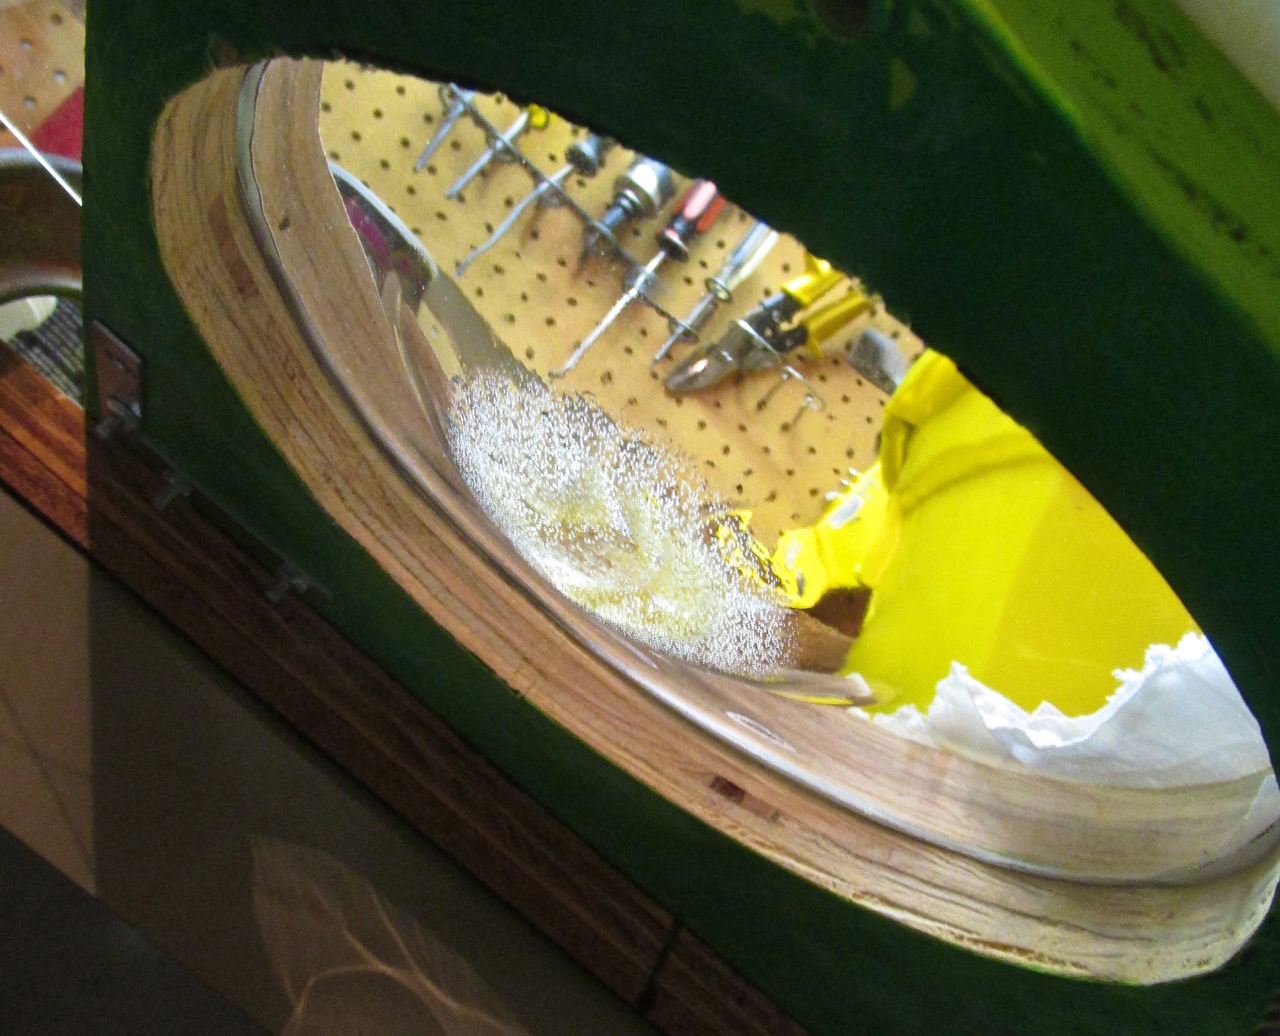
I finally achieved a pretty decent semi-globe protrusion for the round insert. Unfortunately, the down sweep I was crafting moved it just close enough to the heat source to introduce little air bubbles into it. I had reached my limit. I decided this imperfection would be OK because this insert would be installed “on the down low”of the windscreen and not readily seen.
To Make A Long Story Short
I hear people say the phrase above all the time. To me, its utterance is a tacit acknowledgment the eyes of one’s listeners have all glazed over. Since yours probably did about ten pictures, back I will wrap this up.
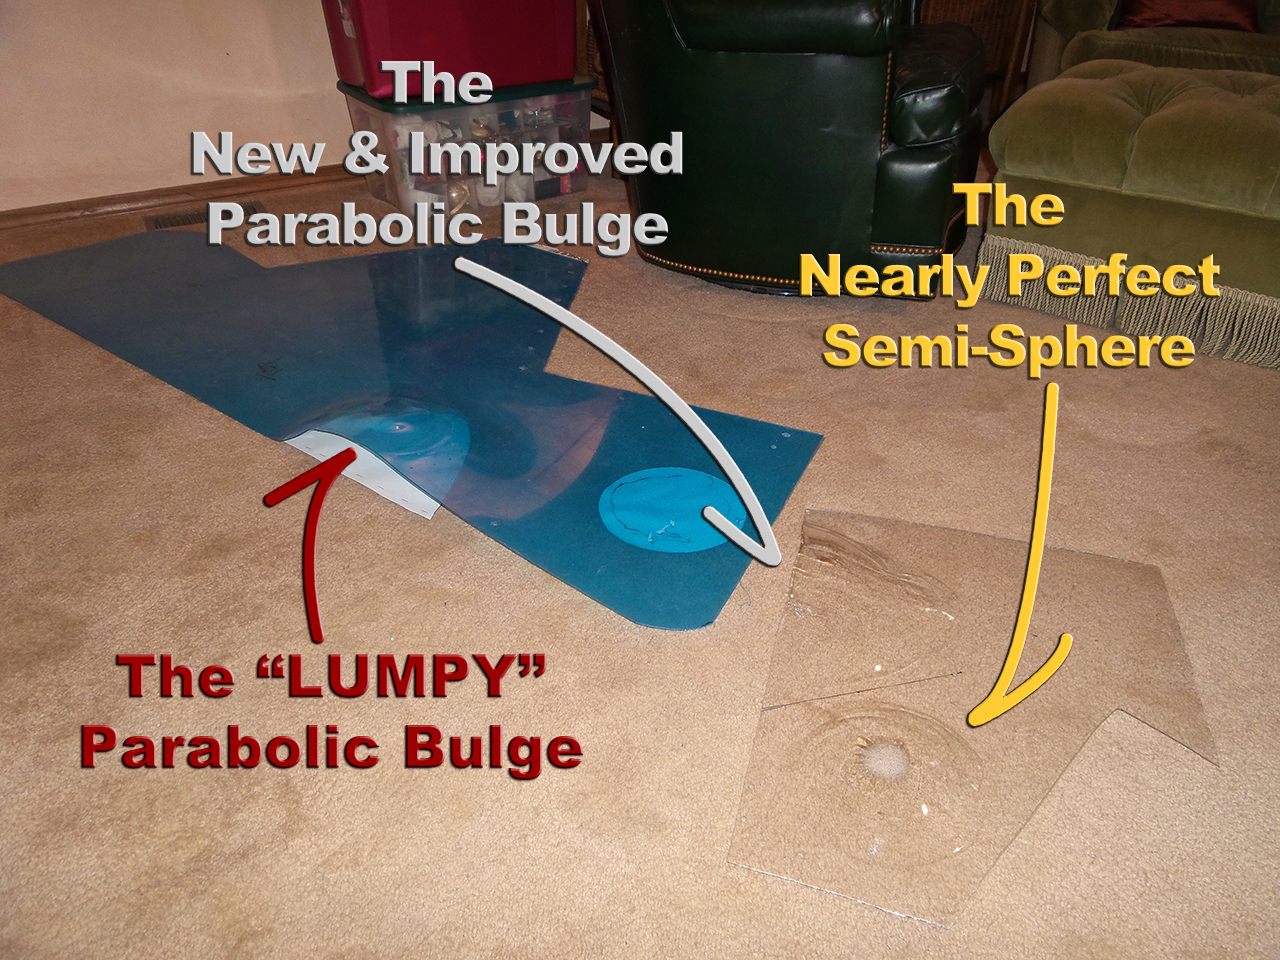
“The New & Improved Parabolic Bulge” looks crinkly and un-smooth in this photo but that is because the camera flash put shadows on the carpet behind the plastic. It is much smoother than it looks. Honest. Trust me.
Living Room Workshop
After “shape shifting” the plastic out on the garage work bench, I moved everything into our living room. My Dear Wife was less than thrilled but I told her I would get it done in 2 days or less and return the space to normal once I was done. It was right before Christmas and the temperature had taken a dive. The garage was much too cold. No, I didn’t work on the carpet. After taking the picture above I laid a tarp down under everything.
Jigsaw
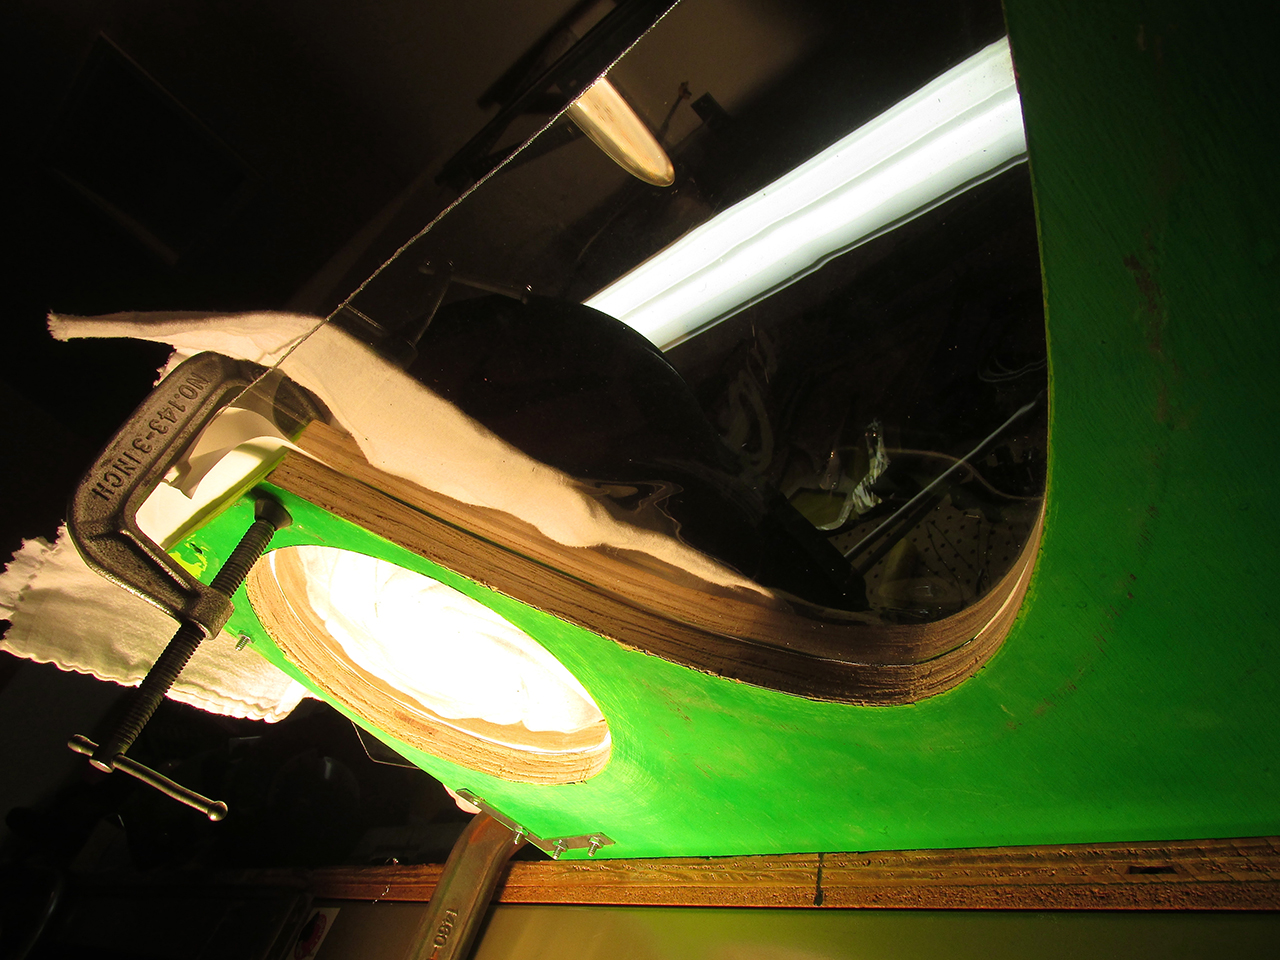
Finally I tried a tool I had bought for this project. I should have used it all along but used scissors and a razor blade knife for the long cuts instead. It is a hand held jigsaw for my Sears 19.2v tool collection. I had used it to cut the wood clamping tool employed to heat form the pieces. To cut the polycarbonate I inserted a metal saw blade. It worked like a dream. With the saw, I cut the two sections out of the windshield and then cut the two insert pieces to fit into them. I left a 3/4″ lip around the inserts for a glue surface. Gorilla Super Glue was the adhesive of choice.
Attachment Result
The Semi-Sphere Implant worked pretty good as far as the theory went. I used the tool as a clamp to keep the halves together after applying the glue. I couldn’t employ the “L” clamps, so I put weights all around to hold it together. I let it cure overnight. The glue was fairly well distributed but was not the WELD I had hoped for. I knew I would have to reinforce with rivets. Regardless, I used the same gluing technique on the Parabolic Insert. I then bought some rivets, drilled all the holes and riveted both pieces over the glue joins. When finished, everything looked much better than I thought it would.
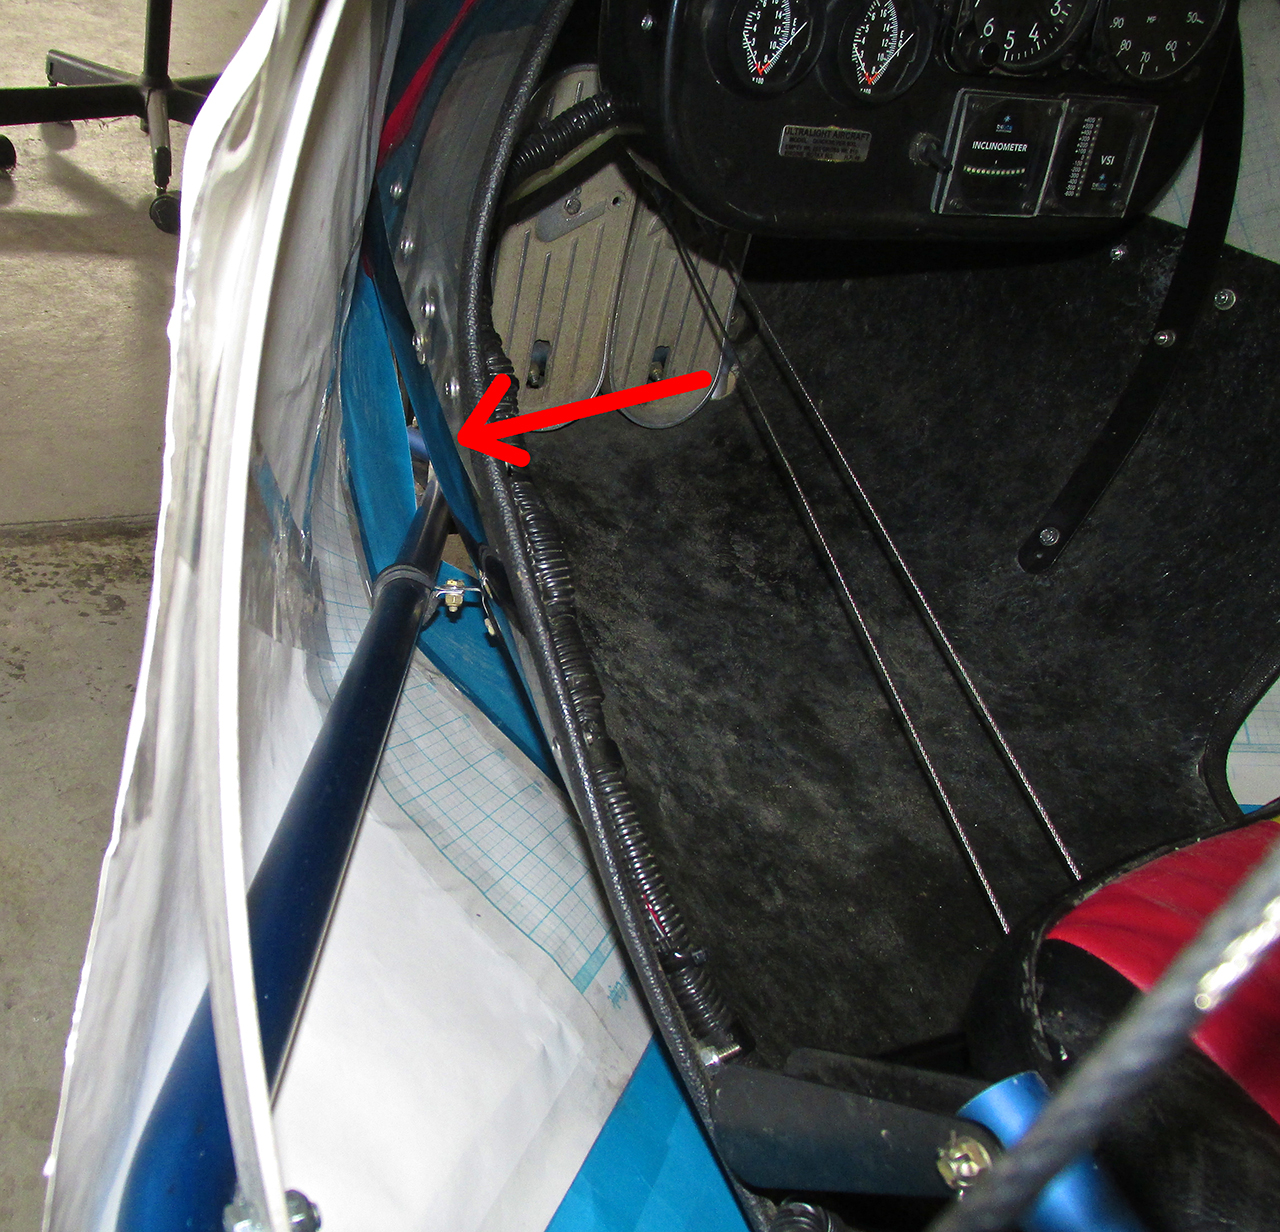
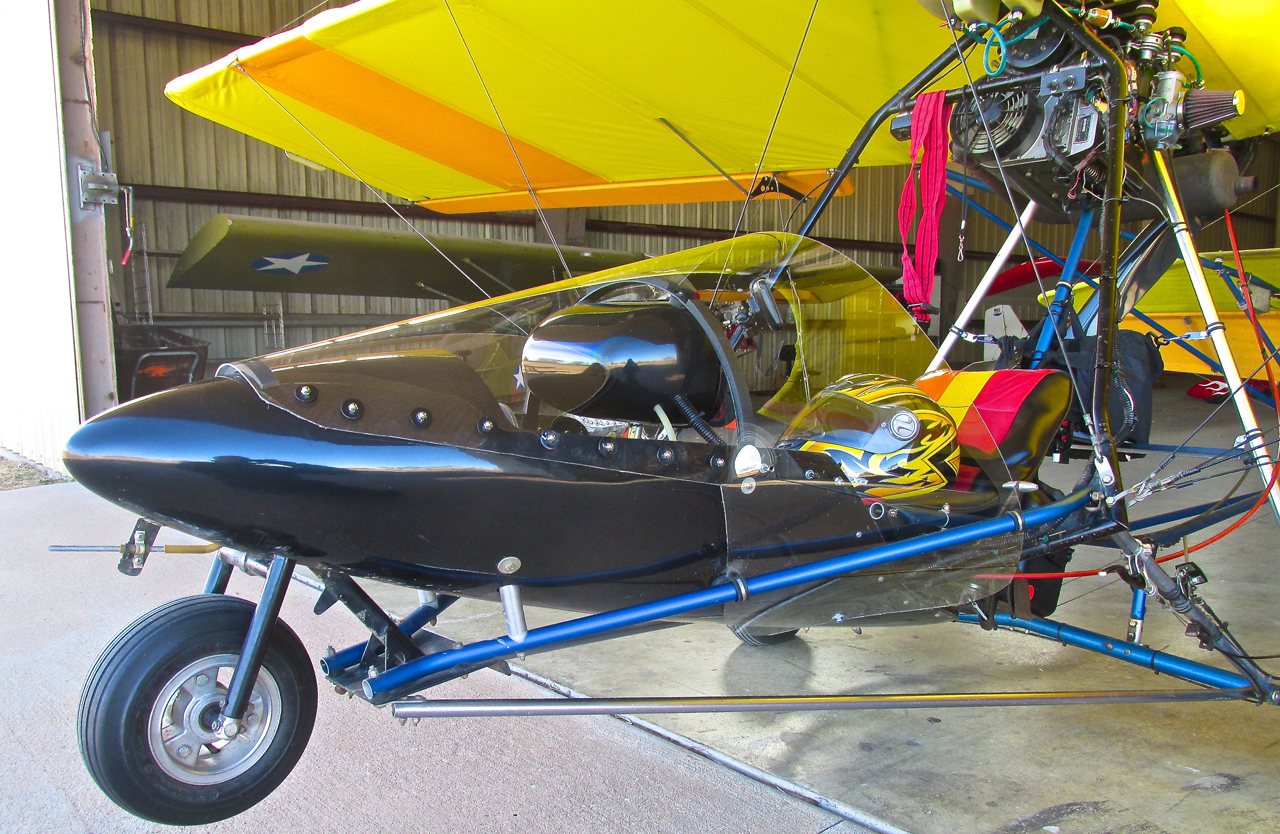
This is the “Stick Side” with the inserts. Strategy #1 intended it to be clean and seamless but frankly am not disappointed with the final result.
In the closeup you can see I had to add two washers behind rivets on the Parabolic. The lip did not cover enough area at that point and was too close to the edge. It needed reinforcement.
To Edge Or Not To Edge
I have some 1/2″ Snap On Trim that I intended to run around the outside edge of the windscreen. Since I was going to put that on I didn’t spend time smoothing off the edge you can see near the bottom of the shot. Now that the thing is in place, though, I’m thinking I like it without trim. That feeling may change, but for now the Winter Pod is sans trim.
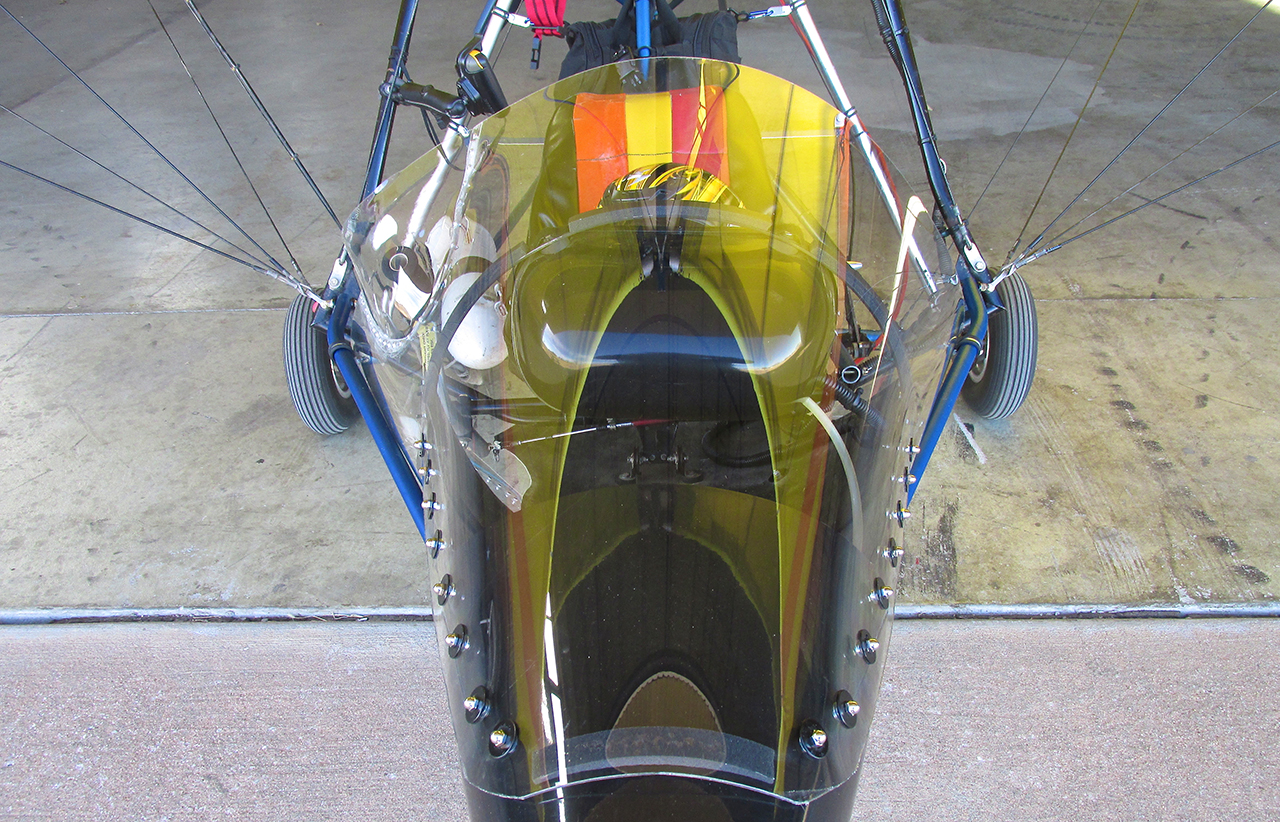
The “Clean” side showing the “Throttle Hand” shielded from Winter Wind.

Test Flight
After the shot taken above, I took out for a spin around the area. Another day long “hot spell”, the temperature was in the low 50’s but the wind was 25 mph and gusty. I stayed up over an hour.
Success
The primary goal of deflecting the wind blast off my hands and torso was a success. It will take a flight on a cold day (32 degrees or less) to really determine if the effort was worth it.
A Secondary Benefit I noticed during the test flight was a complete surprise. It appears I have gained added efficiency from this seemingly small amount of “aerodynamic cleanup” provided by the Winter Windshield. I was able to hold altitude quite well at 4200 rpm – usually that is not sufficient power. Also, at 5500 rpm the plane was hitting 70 mph straight and level. Normally, I never get that fast unless in a dive.
The Saga Comes To An End
The Chronicle of the Winter Windshield Project. As soon as the conditions are right, I will make a distance flight and be able to give you a more balanced performance analysis.
Blue Skies & Tailwinds!™
Brian FitzGerald – Wichita